Come fall, I crave mushrooms. Read enough cooking magazines, and one can’t help but associate mushrooms, optimistically or vicariously, with professional foragers who supply The French Laundry and its ilk. Nice work if you can get it. But I’ve previously stated that, were I to attempt to feed myself via foraging where I live, I’d be lucky to return home with pockets full of sugar beets and an Angus steer slung around my shoulders. And I’d have to cover some serious miles even for that.
Fortunately, I can dependably find a decent range of mushrooms in local grocery stores. Come late October, I begin stalking Costco’s produce area for chanterelles. Great, big, beautiful portabellas; small, plump crimini; and gorgeous shitakes can be had any day of the week within walking distance at my local Lucky’s Market.
I recently mentioned that during this past September and October, work was such an overwhelming overload that my eating habits went straight to hell. Consequently, pasta and I are still taking a break from each other. So what else to do with such a bounty, but wrap them all up in a tart. A storm is threatening. A perfect day to fill the oven.
FOR THE VEGETABLES Prepare the vegetables first, as they’ll need more time in the oven than the tart.
Preheat your oven to 350º.
1 smallish head of broccoli
1/2 head of cauliflower
2 carrots
2 cloves of garlic, smashed and peeled
Sea or kosher salt and pepper
4 ounces of good olive oil
Juice of 1 lemon
Red pepper flakes
Cut the broccoli into pieces about an inch in diameter. Do the same with the cauliflower. Peel the carrots and remove the ends and tips. Slice them on a dramatic diagonal into pieces about 1/2″ thick at the center.
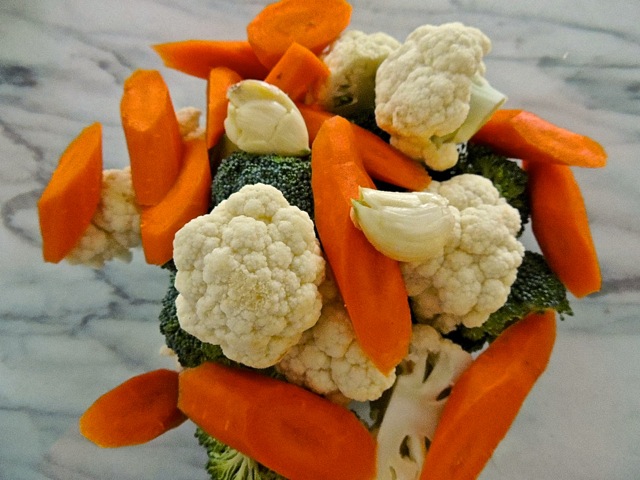
Smash and peel the garlic cloves, but do not mince them.

Place all of the vegetables in a large mixing bowl. Pour the olive oil over them.
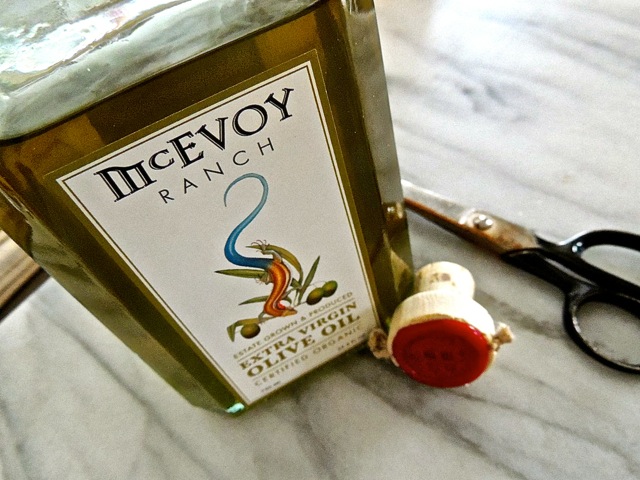
Speaking of olive oil, what constitutes a “good” one?
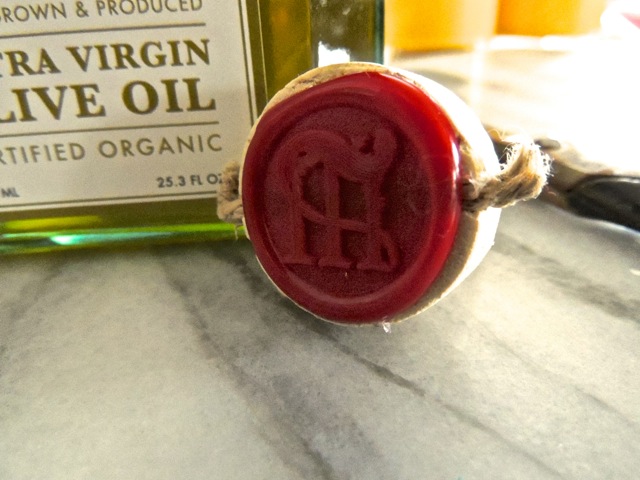
A couple of days ago, I came home to find a large box on my front porch. It was addressed to me! It was from my sister! Once inside, I opened it to find 2 bottles of exquisite olive oil. I have no idea what motivated her to send them to me other than sheer kindness. We both love good olive oils. This one, from McEvoy Ranch in Petaluma, California is one of the genuinely great California olive oils. It is described as, “a complex blend of Tuscan varietals, harvested early and by hand – full-bodied and peppery, with hints of artichoke and greens.” Swoon.
It is not one for general cooking; rather, it is for times when the olive oil is going to be an essential portion of a flavor profile. Times just like this.
Add a teaspoon of salt and some grinds of pepper. With a large spoon, toss everything together. Keep the bowl; you can re-use it just as it is with the mushrooms. Transfer the vegetables to a covered roasting pan or casserole. Place it in the oven at the point when you place the rolled-out pastry in the refrigerator.

FOR THE TART
Mushrooms – use what you like. I started with 1 pound of chanterelles, 1/2 pound of shitakes, and 1 large portabella
Fresh rosemary stripped from a 5″ or 6″ stem
2 large shallots
2 tablespoons each of butter and olive oil, twice
Sea or kosher salt and pepper to taste
1 round of Perfect Flaky Pastry
1 beaten egg
If you’re lucky, you’ll have stashed away in the freezer a round of perfect flaky pastry. If not, it comes together very quickly.
Dust your work surface with flour and set the pastry in its center. Also dust the top of the pastry.
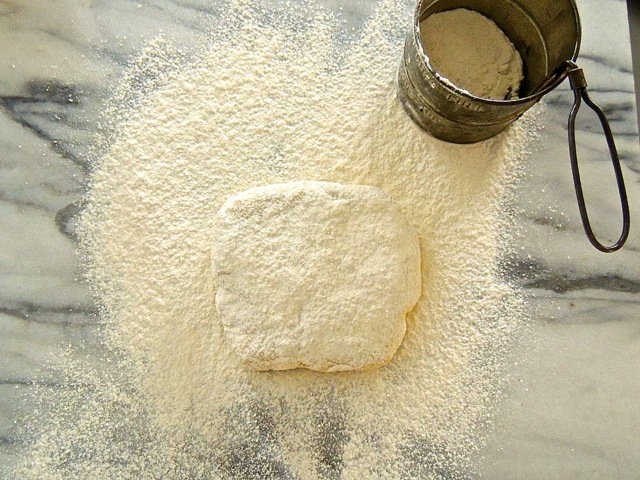
Begin rolling it out. Be sure to roll in all directions, and to lift your rolling pin before you reach the edges. That way, your pastry will not be thinner at the edges than at the center. Get it to about 14 inches in diameter.

Line a baking sheet with parchment. Roll your pastry onto the rolling pin, then gently unroll it onto the parchment.

Drape a sheet of plastic over it and set it in the refrigerator while you prepare the mushroom filling. Also place the casserole in the oven.
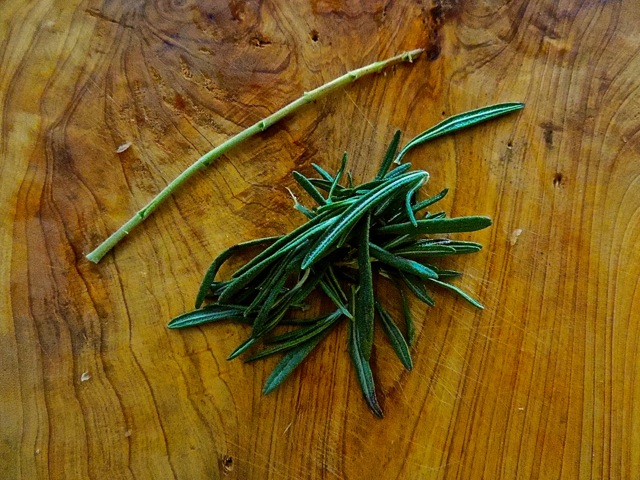
Strip the rosemary from its stem and chop it finely.

Peel and slice the shallots about 1/4″ thick. I know mushrooms shouldn’t be washed, but chanterelles can be full of both pine needles and dirt. I fill a bowl with cold water, immerse them, and agitate them. I have some paper towels nearby, and lift them out of the water and onto the paper towels. Don’t pour them through a colander to drain them, as you’ll pour the dirt you washed off of them back onto them.
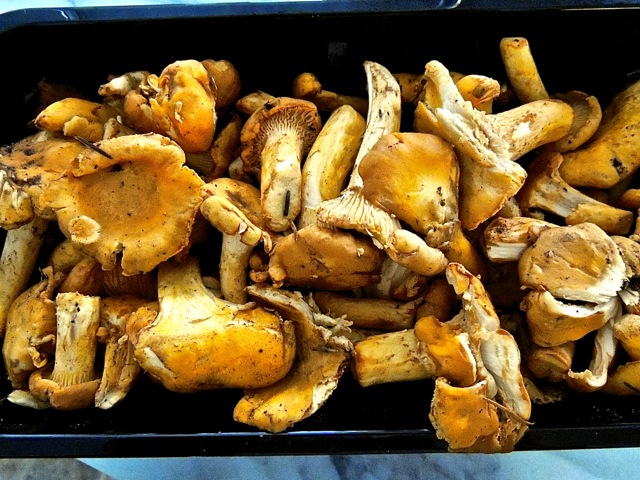
Gently wipe the caps of the other mushrooms with a dry paper towel. Pop the stem out of the portabella; if using shitakes, trim them off with a knife. There is no need to trim anything from the chanterelles. Quarter the shitakes; roughly slice the chanterelles. If you’re using a portabella, do slice it as thin as possible – this is a good job for a mandolin.

Roughly chop the chanterelles.

Begin warming a large skillet over medium heat. Add the butter and olive oil. When the butter has melted, add the shallots and chopped rosemary. Sauté them until they begin to soften, about 3 minutes. Add half the mushrooms along with about a half teaspoon of salt. Cook them until they’ve softened and begun to release their juices. Pour everything into a colander set in a large bowl. You want to retain their liquid. You’ll see why in a moment. Add another dose of butter and olive oil to the skillet and cook the remaining mushrooms, then drain them. With a large spoon toss the mushroom mixture together. Taste, and season as needed with salt and pepper.
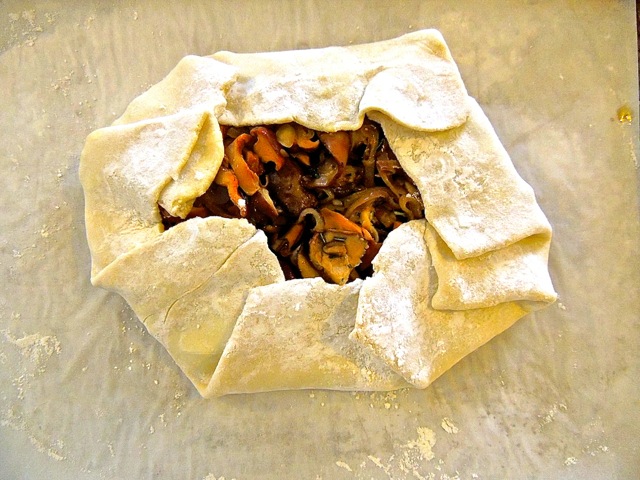
Remove your pastry from the refrigerator. Arrange the mushrooms in an even layer in its center, leaving about a 2 inch border.

Carefully fold the edge of the pastry over the edge of the mushrooms, pleating it gently as you go.
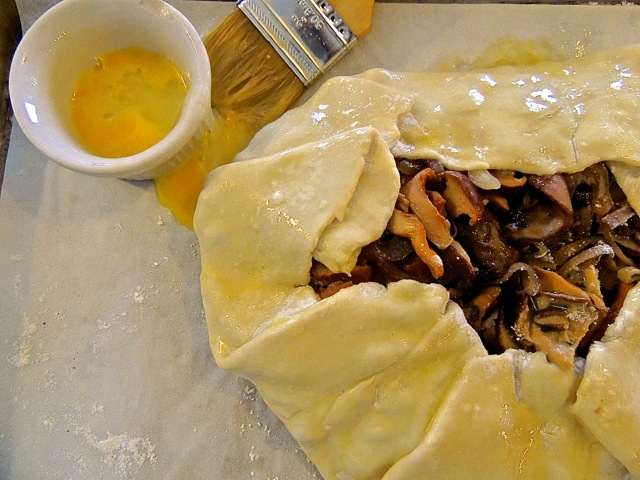
Brush the edges of the pastry with the beaten egg.
Before placing the tart in the oven, take out the casserole containing the vegetables and remove its lid. Pour in the collected liquids from the mushrooms and chard, replace the lid and set the pot back in the oven.
Raise the heat to 375º. Now put the tart in the oven. Set a timer for 20 minutes and when it goes off, rotate the tart and set the timer again for 20 minutes.
When the timer goes off the second time, remove the vegetables from the oven and raise the temperature to 425º. Bake the tart for an additional 5 to 10 minutes to brown the crust well.
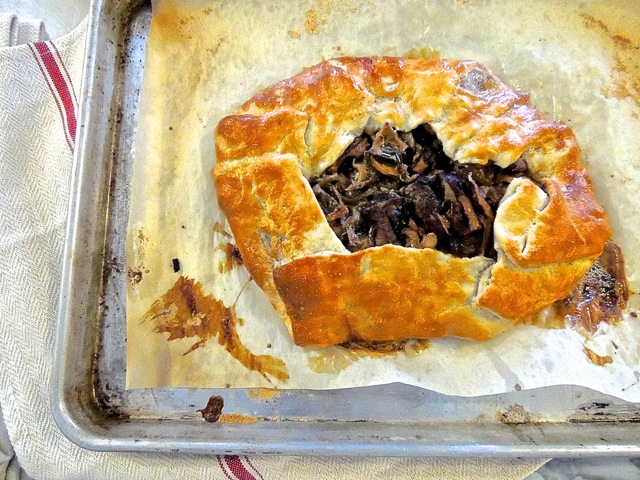
Remove the tart from the oven and let it set for 5 minutes before you cut into it. I dare you to resist pulling tidbits of mushrooms from the top.
Before serving the vegetables, remove the lid and add the lemon juice and red pepper flakes. Gently stir them about with a spoon. Remove the garlic cloves.
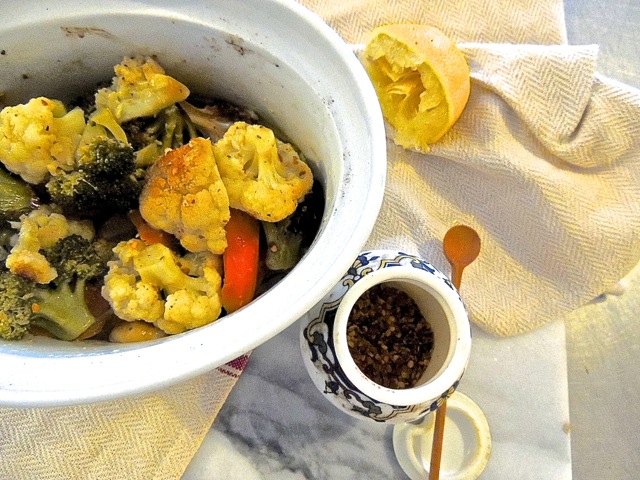
Slice the tart into wedges and serve on a plate along with a generous helping of the gorgeous vegetables.

Bliss on a chilly evening.